After you have created an email address in our control panel, you can send and receive emails using your Android phone. Please note that not all Android phone setting structures are the same, so your phone settings might be a little different. In these instructions we have used the Gmail provided by Android.
Setting up the email account
1. Open your email program and choose settings.
2. Click “Add account”.

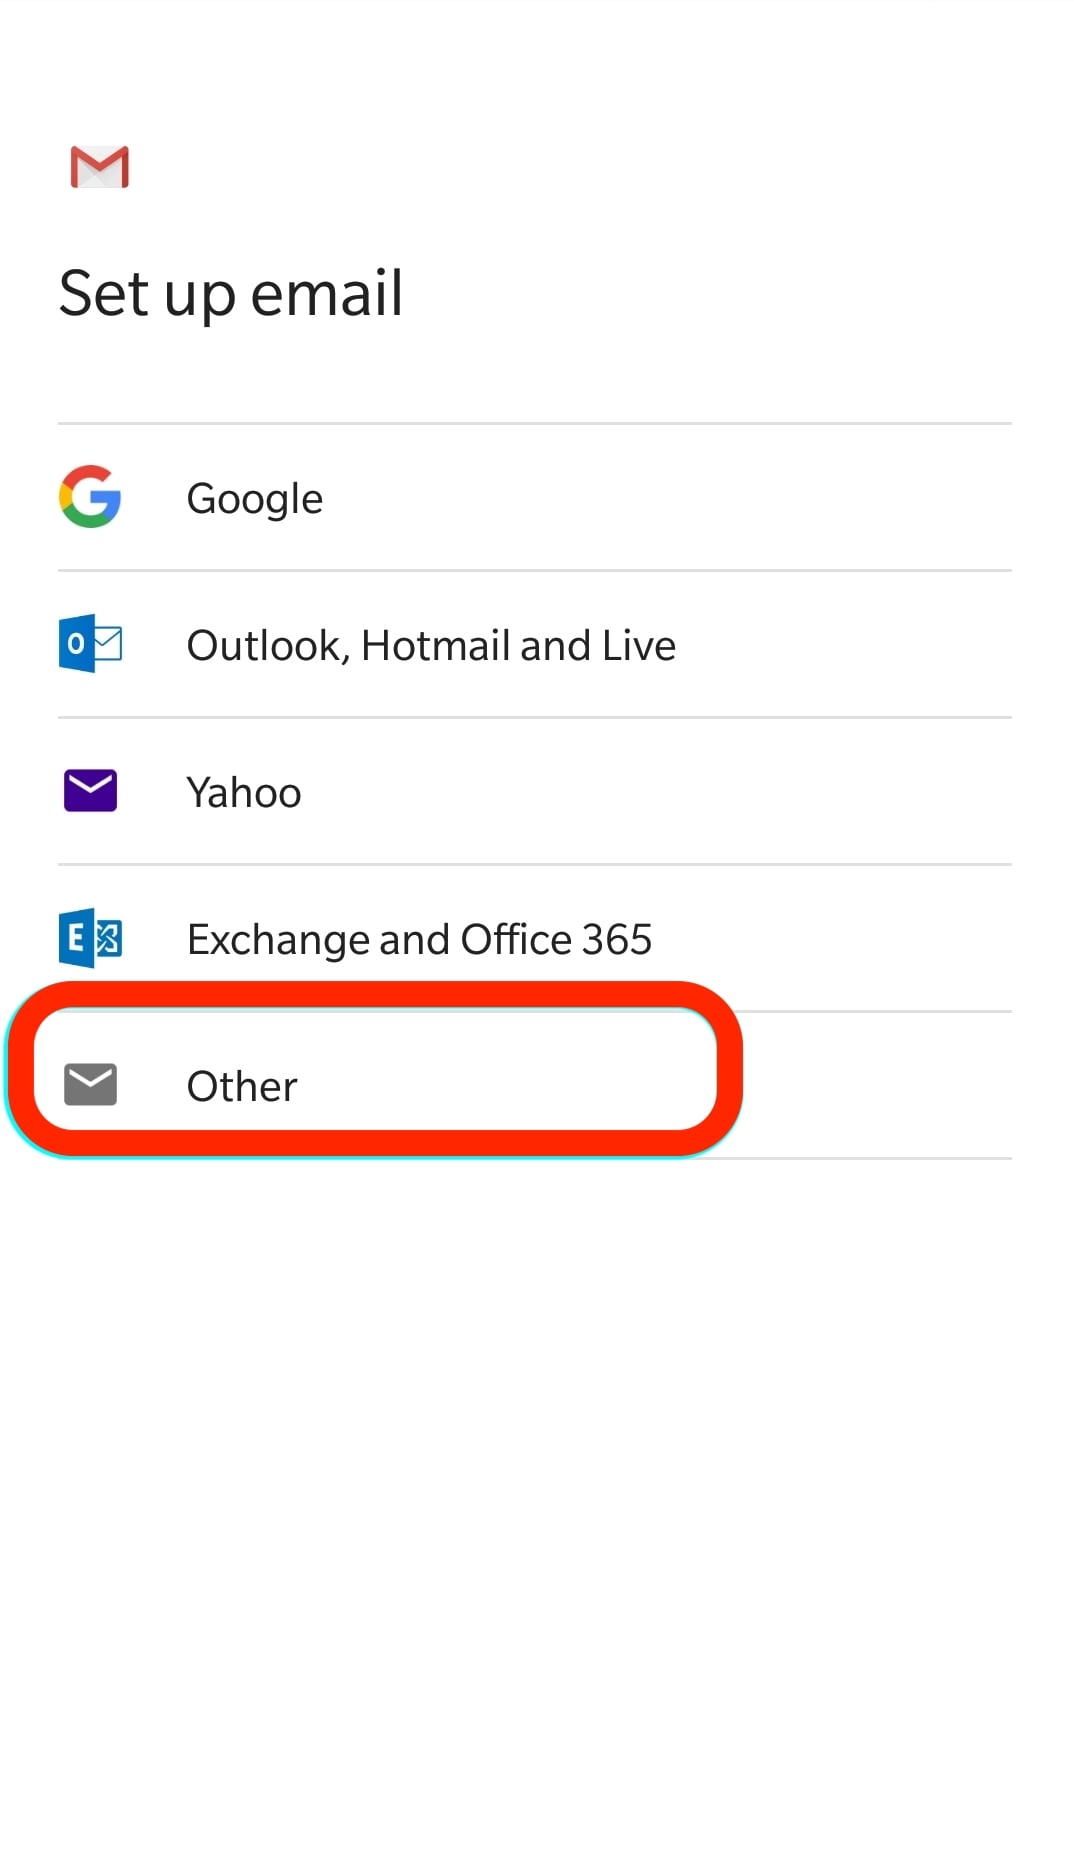
3. Choose “Other”

4. Write your whole email address and click “Manual setup”.
Click “Next”.

5. Choose “Personal (IMAP)”.

6. Fill in the password and click “Next”.

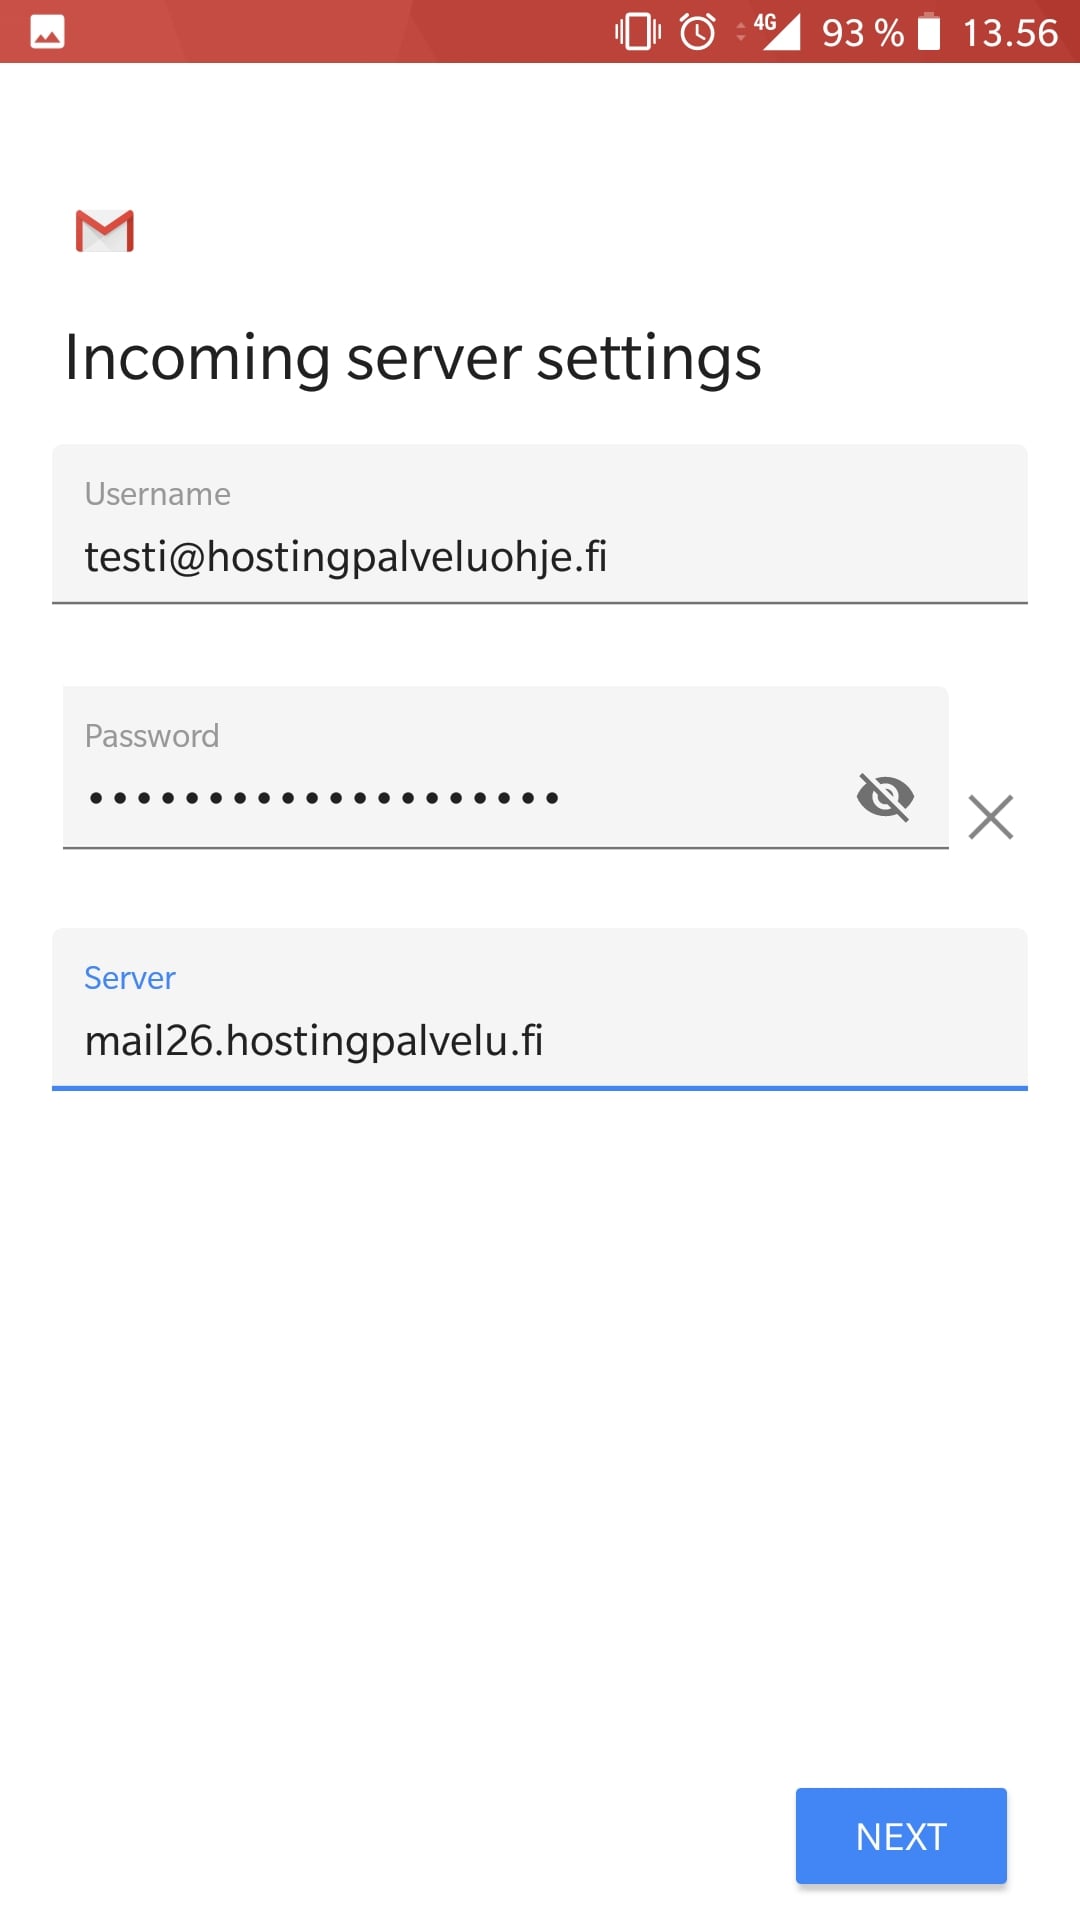
7. Fill in the correct hostname for incoming email. It should be mailX.hostingpalvelu.fi. X is the number of the server, where your account is located. You’ll find the correct information from your client area, from our customer service or from the “Hosting account’s information” message that has been sent to you.

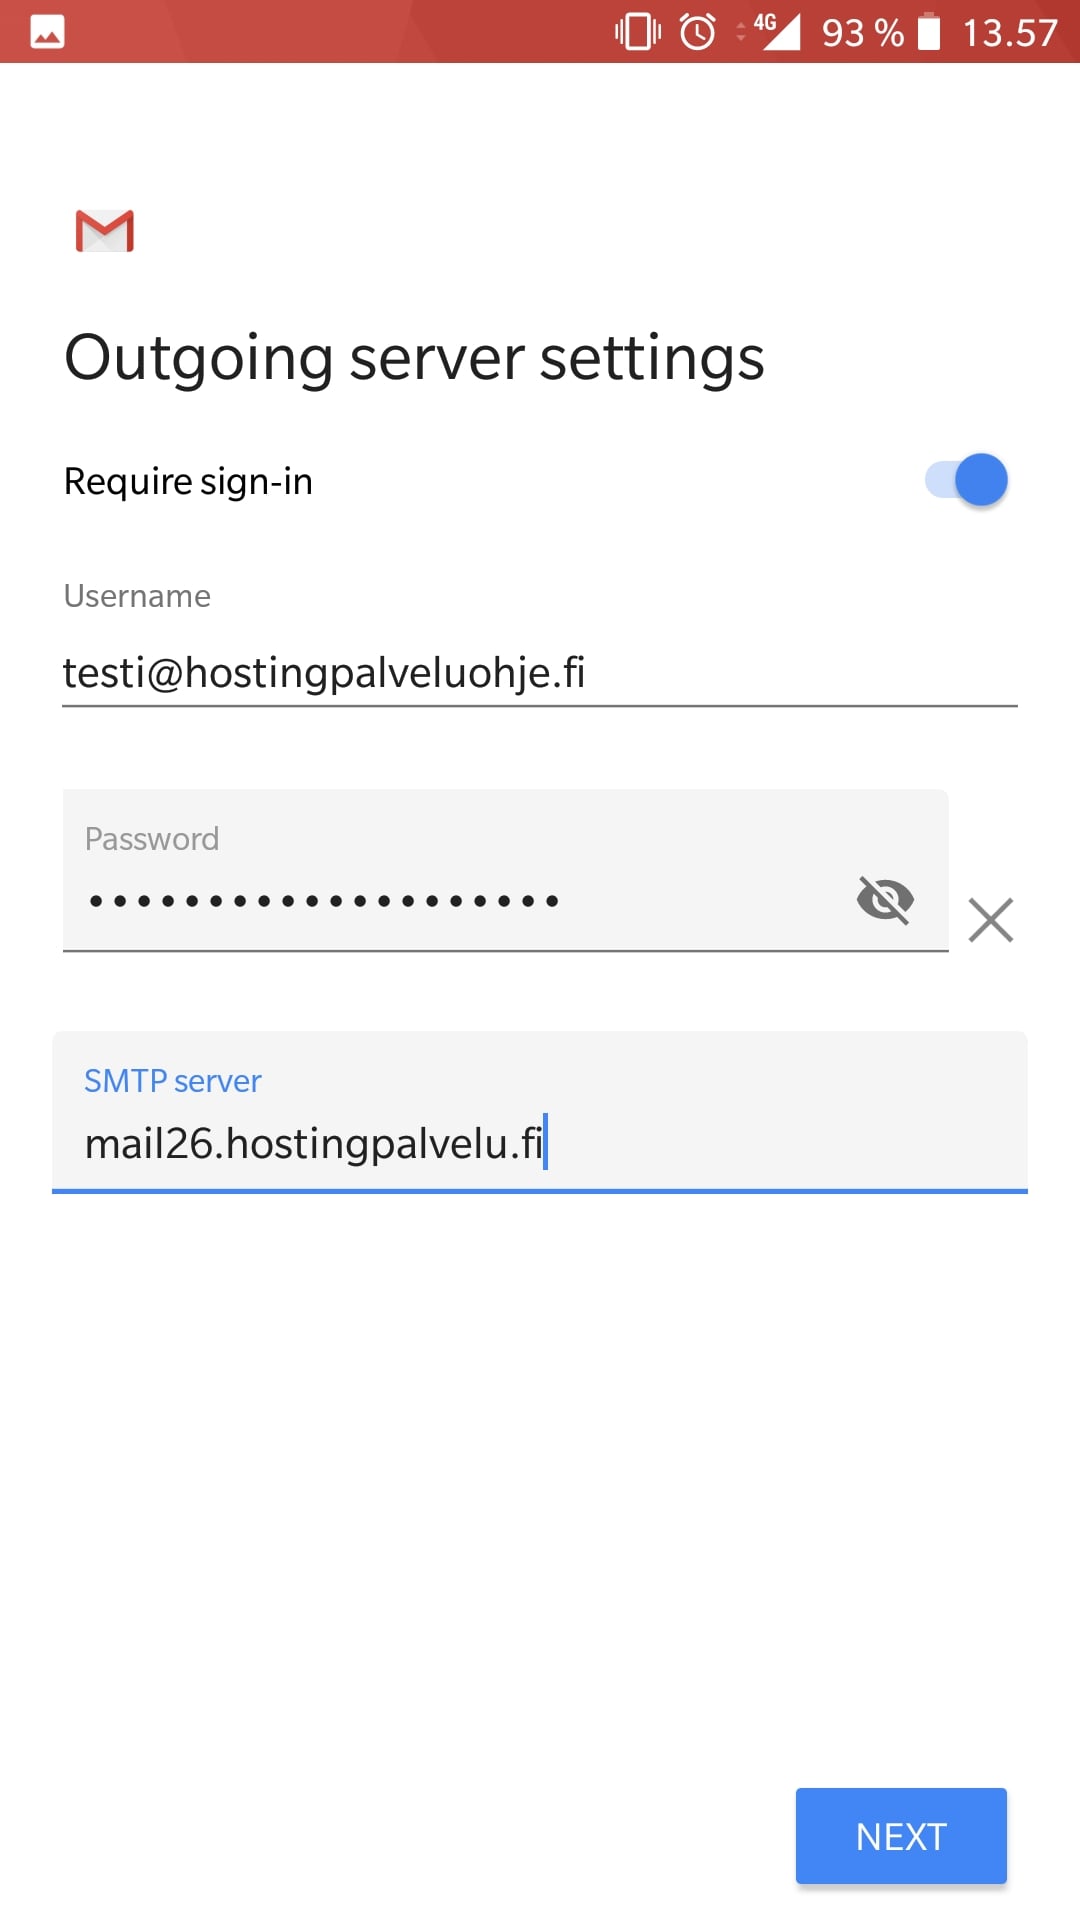
8. Fill in the correct hostname for outgoing email. It should be mailX.hostingpalvelu.fi. X is the number of the server, where your account is located. You’ll find the correct information from your client area, from our customer service or from the “Hosting account’s information” message that has been sent to you.

9. Choose the settings you like.

10. The account has been configurated!

IMAP settings
Let’s check that your incoming emails have the right settings.
Go to settings and choose the account you just configured.

Choose “Incoming settings”

Please check, that the username is your whole email address, you have a password and the hostname is correct.
Check also, that the gate is 993 and the security type is SSL/TLS.

SMTP settings
Finally, let’s check that your outgoing emails have the right settings.
Go to settings and choose the account you just configured.

Choose “Outgoing settings”

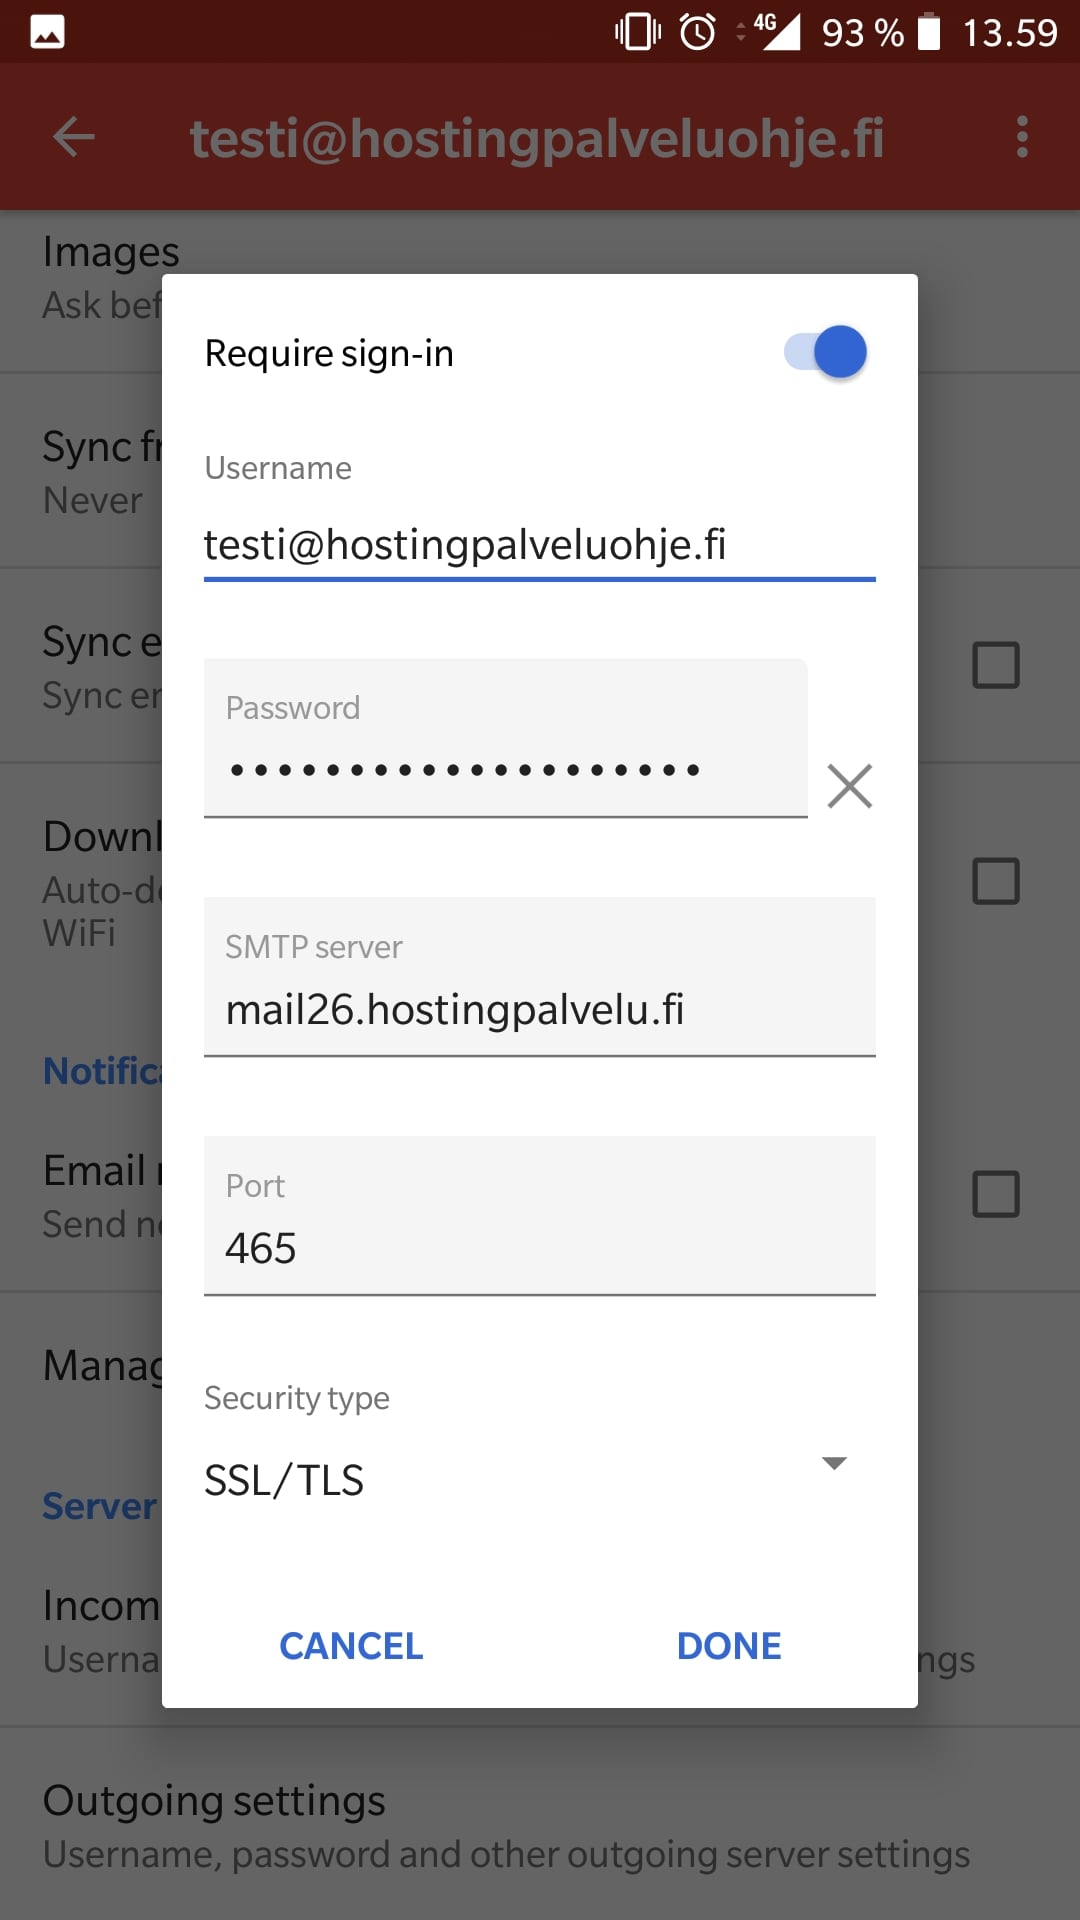
Please check, that the username is your whole email address, you have a password and the hostname is correct.
Check also, that the gate is 465 and the security type is SSL/TLS.
You should also have checked the box “Require sign-in”.


